If the partner has multiple Entra tenants with additional domains that need to authenticate through the same Beyond Identity deployment, you can configure cross-tenant access settings. This allows all of the partner’s tenants and domains to use a single Beyond Identity deployment for seamless, centralized authentication.
Set up WSFED
https://learn.microsoft.com/en-us/entra/external-id/direct-federation
https://docs.beyondidentity.com/docs/access-control/applications/wsfed
DNS / Domain Binding
- In some cases, the partner’s IdP endpoints may reside under a different domain than their user domain. If so, a DNS TXT record may be needed to assert the mapping. Microsoft Learn
- IDP SSO URL from Multi-Tenant-1 must go in the TXT @ record (DirectFedAuthURL= ”replace with IDP SSO URL from the federation”) for the Multi-Tenant-2 domain. URL ends in SSO
Example: If the authentication endpoint is https://Multi-Tenant-2.com/adfs, but the user domain is Multi-Tenant-1.com, the partner might add a TXT record:
Multi-Tenant-2.IN TXT DirectFedAuthUrl = ”replace with IDP SSO URL from the federation”
- This tells Entra that the “Multi-Tenant-1” IdP is valid for “Multi-Tenant-2”. Microsoft Learn
- If the IdP’s passive authentication endpoint is under the same domain (or a subdomain), DNS changes often aren’t needed. Microsoft Learn
Configure the Cross Tenant Access settings.
- Sign in to the Microsoft Entra admin center as at least a Security Administrator.
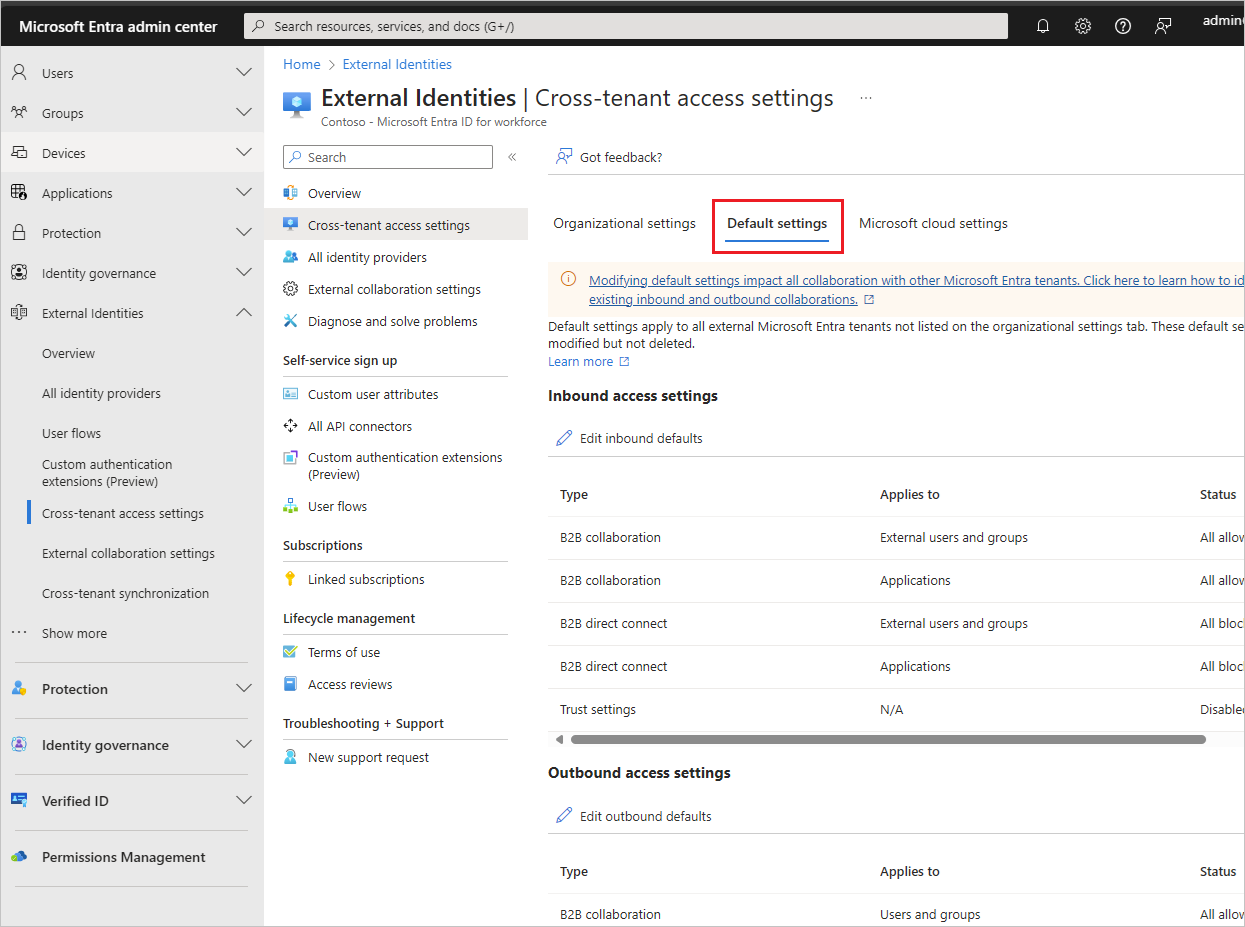
- Browse to Entra ID > External Identities > Cross-tenant access settings.
-
Select the Default settings tab and review the summary page.
-
To change the settings, select the Edit inbound defaults link or the Edit outbound defaults link.
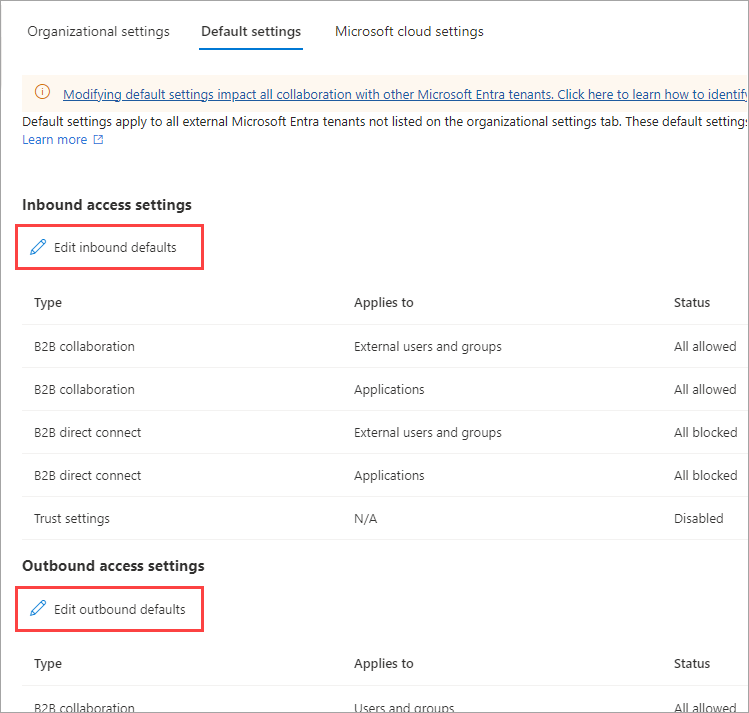
- Set all the appropriate options to Allow.
Add an organization
Follow these steps to configure customized settings for specific organizations.
- Sign in to the Microsoft Entra admin center as at least a Security Administrator.
- Browse to Entra ID > External Identities > Cross-tenant access settings.
- Select Organizational settings.
- Select Add organization.
-
On the Add organization pane, type the full domain name (or tenant ID) for the organization.
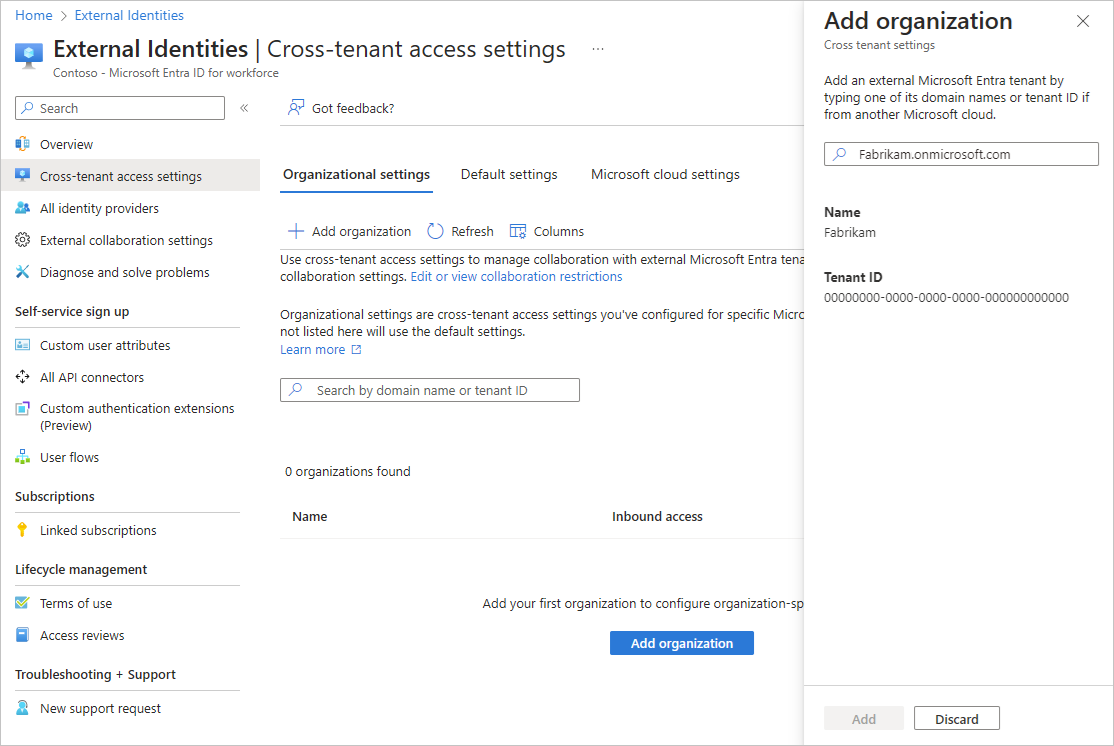
6. Select the organization in the search results, and then select Add.
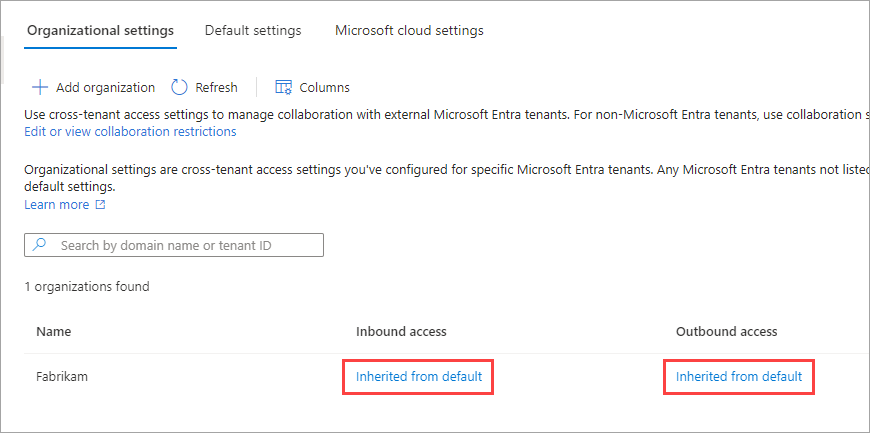
7. The organization appears in the Organizational settings list. At this point, all access settings for this organization are inherited from your default settings. To change the settings for this organization, select the Inherited from default link under the Inbound access or Outbound access column.
8. Modify the organization's settings by following the detailed steps in these sections:
9. Edit the redemption order to put the SAML/WS-Fed option at the top of the list and make sure it is enabled
You can reference this document to understand more about how the feature works.
https://learn.microsoft.com/en-us/entra/external-id/redemption-experience#invitation-redemption-flow
Additional Docs to review:
https://learn.microsoft.com/en-us/entra/external-id/cross-tenant-access-overview
https://learn.microsoft.com/en-us/entra/external-id/cross-tenant-access-settings-b2b-direct-connect
Comments
0 comments
Please sign in to leave a comment.